
 FR
FR  EN
EN  ZH
ZH Inspect the substrate to ensure it is clean, stable, and free of gaps.

Installation
Installation Steps
-
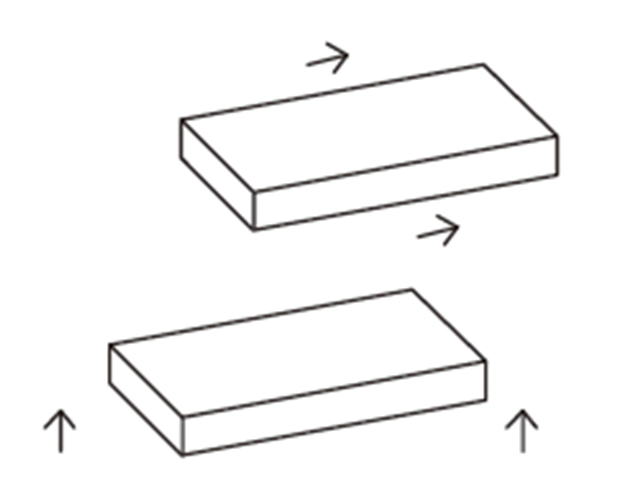 Transporting the ProductsDo not drag the products. Always lift them from the ground for transportation
 -
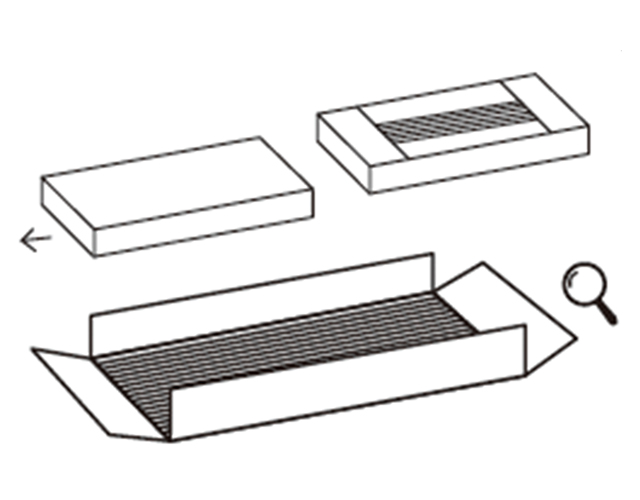 Transporting the ProductsDo not drag the products. Always lift them from the ground for transportation
 -
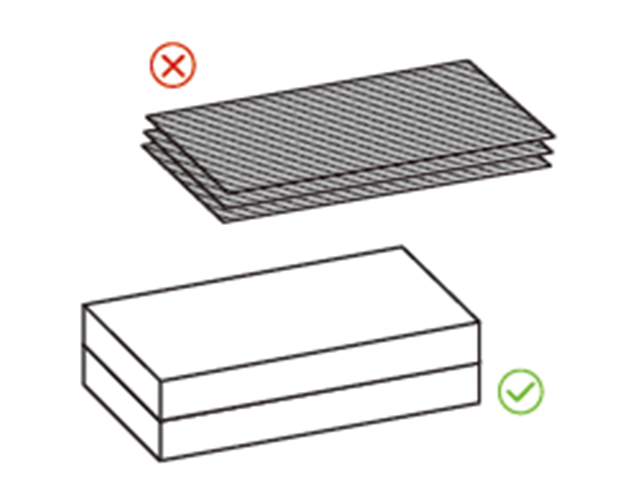 Transporting the ProductsDo not drag the products. Always lift them from the ground for transportation
 -
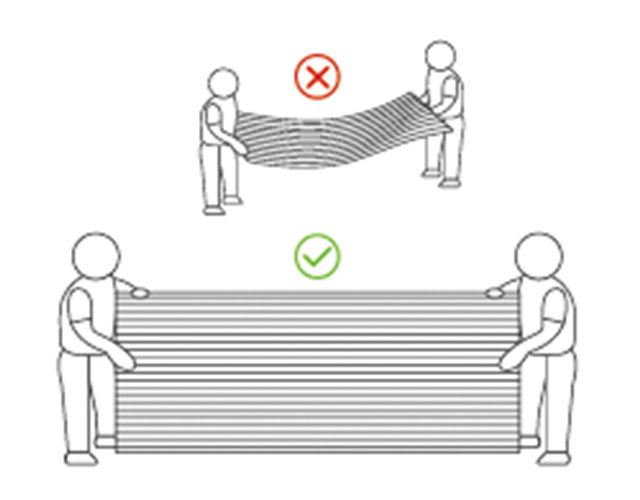 Transporting the ProductsDo not drag the products. Always lift them from the ground for transportation
01. Substrate Preparation
02. Measure Dimensions
Measure the exact dimensions of the wall, and mark the required measurements on the Flexible Stone.
03. Marking the Layout
Use a chalk line and spirit level to snap reference lines on the substrate, ensuring the first row of tiles is perfectly level and plumb.
04. Cutting the Product
Cut the Flexible Stone using a woodworking saw or a handheld cutter.
05. Trimming/Sanding the Product
Use an angle grinder to trim and smooth any uneven edges of the Flexible Stone.
06. Mixing the Adhesive
Following the ratio specified in the adhesive product instructions, thoroughly and uniformly mix the powdered adhesive with water.
*Note: The mixed adhesive should be used within the specified time (e.g., 2 hours). Never add water to the mixture a second time.
07. Applying the Adhesive
Use a notched trowel to spread the adhesive evenly onto the substrate. Ensure a minimum adhesive coverage of ≥ 90%, a thickness of 2-3mm, and create uniform ridges with the trowel.
08. Installing the Flexible Stone
Align the Flexible Stone with the reference lines. Gently press and set the tile into place using a rubber mallet and a rubber-faced beating block.Gently tap from the center outward with the rubber beating block to ensure full adhesion and eliminate air pockets.
*Note: Promptly clean any excess adhesive that squeezes out with a damp cloth.
09. Joint Spacing Control
Use a dedicated joint spacer or other suitable spacing tools to ensure uniform joint width throughout. (Recommended joint width: 1-3mm)
10. Grouting
· Ensure the joints are dry and clear of any debris.
· Mix the matching grout according to instructions. Use a grout bag to press the grout firmly into the joints.
· Once the grout begins to set (surface starts to lose moisture), use a grout shaping tool to clean excess grout from the tile surface,being careful not to pull grout out of the joints.
11. Surface Cleaning
Clean the surface thoroughly with a cleaning damp cloth after installation is complete
12. Curing and Protection
Avoid heavy pressure, scratching, water exposure, or contamination until the adhesive and grout are fully cured (typically 48-72 hours).
Special Handling Procedures
-
Color-Matched Joint Treatment
Tools Required: Small scraper, painter’s tape, color-matched grout, grout bag, grout shaping tool, dry sponge.
Based On The Product Color, Take An Appropriate Amount Of Colorant And Mix It With The Grout Until It Matches The Product Color Exactly.After Installing The Product With Spaced Joints, Apply Painter’s Tape Along Both Sides Of The Joints (For Textured/Embossed Products, Take Care To Protect The Surface).Apply The Mixed Grout Evenly Into The Joints.Use A Grout Shaping Tool To Smooth And Shape The Joints Along The Entire Length.Once Dry, Carefully Remove The Painter’s Tape.Clean The Surface With A Dry Sponge. The Process Is Now Complete. -
45° External Corner Treatment
Tools Required: Angle Grinder, Small Scraper, Grinding Disc, Color-Matched Grout Or Touch-Up Filler, Paintbrush, Beating Block, Dry Sponge.
Use An Angle Grinder To Bevel The Edge Of The Joint To A 45° Angle.Apply Adhesive To The Back Edge Of The Product At A 45° Angle, With The Adhesive Layer About 3Mm Higher Than The Surface PlaneAfter Installing The Product, Press It Firmly With A Beating Block—Do Not Press By Hand. Once The Adhesive Is Dry, Use A Small Scraper To Remove Any Excess Adhesive.If The Joint Is Not Completely Filled, Use A Paintbrush Dipped In A Small Amount Of Grout To Carefully Fill The Gap.Use The Grinder To Smooth The Edges At A 45° Angle For A Neat Corner Finish.Clean The Surface With A Dry Sponge. The Process Is Now Complete.


